Skip to content
Main Content
No content

How to Build a Gaming PC
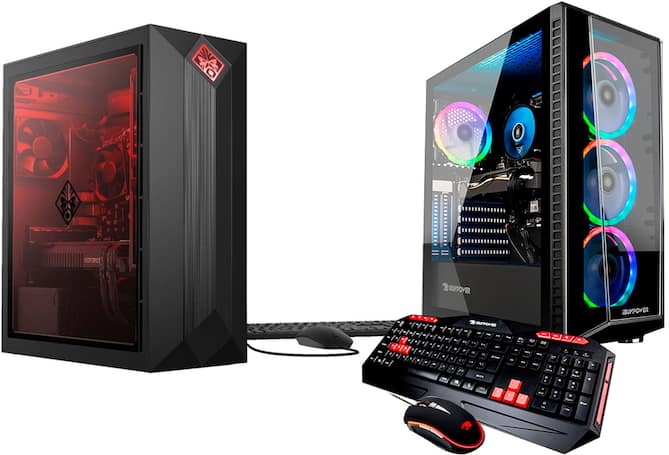
Gaming desktops

Game like a pro with key parts and components

Building a gaming PC is an exciting undertaking. The process is relatively simple, although you need to select compatible components with care. The upside of building a computer for gaming purposes is that you get to choose what matters to you and not waste money on nonessentials.

What is a gaming PC?

A PC gaming computer differs from off-the-shelf PCs in many respects. For starters, it has a more powerful central processing unit (CPU) and an advanced graphics processing unit (GPU), also referred to as a video graphics card. These two components work together to provide the additional power necessary to play the latest PC games with detailed and immersive visual content. Plus, many gaming PC components come with configurable lights and other visual enhancements that make gaming setup more fun.

What do you need to build a gaming PC?

Before you decide on what parts you’ll need to build your personalized gaming PC, first consider the games you intend to play. You'll find recommended CPU and GPU specifications for those preferred games on the vendor's website and gaming review sites. Once you know those details, you can start selecting components.

CPU and GPU

The CPU and GPU determine how well your computer performs. The brand of CPU you choose isn't important as long as the model has a higher specification than the minimum required for your preferred games. The same applies to the GPU. While your overall project budget is likely a factor, you'll get better performance from the latest generation CPUs and GPUs which can be higher in price.

Motherboard

The motherboard is where you mount your components and, apart from the CPU, must have one or more PCI-E x16 slots for the GPU. Choose a motherboard that's compatible with your CPU with the right socket and support for the particular model you're buying. If necessary, go to the motherboard manufacturer's website. Motherboards come in four sizes:

  • ATX
  • Mini-ITX
  • Micro-ATX
  • EATX

ATX and EATX motherboards are best for gaming because they have many slots for adding functionality.

RAM

Random-access memory (RAM) refers to stored data that is read only. For gaming, you could either start with 8 GB, bump up to a better 16 GB, or opt for 32 GB, which is more than enough. Motherboards have two, four or more RAM slots. If you're buying 16 GB, buy two 8 GB RAM cards because motherboards have two RAM channels. The motherboard specification tells you the type of RAM to use (DDR3, 4 or 5), the maximum amount of RAM you can place in each slot, and which slots to use.

Internal drives

You'll need at least one internal drive with 500 GB of memory. If your budget allows, consider buying a solid-state drive (SSD) to help your computer boot faster than with just a hard disk drive (HDD).

Tower

Before choosing a gaming tower, which is also called a computer case, check to see if it's suitable for your motherboard size and has space for your GPU. Be sure to allow room for the power supply, cooling system and peripherals.

Power supply

Gaming equipment uses lots of power, so pick a power supply with enough capacity. Most power supply manufacturers have calculators on their websites for estimating required power supply size. Remember to check whether the power supply comes with the right connectors for your motherboard, GPU and peripherals or if you need to buy those separately.

Cooling

Because the increase in power creates more heat output, fans are needed to keep your gaming PC cool, thus preventing damage. It’s best to have at least two air intake CPU cooling fans mounted in the front of the tower and two at the back to exhaust hot air. If your budget can stretch, consider a liquid cooling kit that connects to your CPU in place of the standard CPU fan.

Other components

You may need also need several extra components and PC mounting accessories, depending on your preferences and needs. These include:

  • DVD drive for loading software
  • Sound card for improved audio
  • Racks for supporting multiple drives
  • USB ports
  • Multi-colored LED lighting

Assembling your gaming PC

Once you gather all the components, assembling your PC is reasonably straightforward. Although you must take care, be patient and keep everything clean with PC build tools. For example, avoid the risk of damage due to static electricity by using an antistatic wrist strap or project mat when handling components. Plus, you'll need hand tools, such as a flat-head screwdriver, for assembling components.

1. Populate the motherboard

Begin by installing the CPU into its socket on the motherboard; it only fits in one position. If you're using an AMD CPU, be very careful not to bend the pins. Carefully follow the instructions supplied with the motherboard and CPU. When you fit the fan, place some thermal paste between the fan's aluminum heatsink and the CPU. Fasten the CPU and fan to the board, following the motherboard manufacturer's instructions. Then install the RAM into the appropriate slots in the motherboard. Once you're happy with the placements, install the motherboard in the tower using the supplied screws.

2. Install other components

Start by fastening the power supply into the base of the tower. Fit the GPU onto the PCI-E x16 slots. Install internal drives, cooling fans and other peripherals. Then, connect everything to the power supply, which has ports for all your peripherals. Be sure to follow the motherboard manufacturer's instructions exactly when connecting power cables. After that step, connect the appropriate power connector to the GPU.

Next, attach the fans to the motherboard using the three- or four-pin connectors on the fans. Connect hard drives to the motherboard using the Serial ATA (SATA) cables. Attach the primary drive to the first SATA slot on the motherboard. Plug in the connectors for the power button, microphone, earphone sockets and case-mounted USB drives. Lastly, check that you've installed everything properly and connected all power cables.

Booting up and troubleshooting

Before powering up, create a Windows® bootable USB drive using an 8 GB or larger memory stick and Windows Media® creator on another PC. When finished, connect the power and switch on. If you've correctly installed everything, the PC will boot up. If the PC doesn't start up, start troubleshooting by carefully check every connection. Don't go into the Basic Input Operating System (BIOS) unless necessary, as the default settings should work. Finally, switch off the PC and insert the Windows boot USB and restart the PC. It should reboot a few times before it finds the USB stick and starts installing the operating system software.

How much does it cost to build a gaming PC?

It's difficult to say how much a gaming PC costs to build because it depends on your personal preferences. However, you're unlikely to find a pre-configured, new gaming desktop with similar specifications at a lower price. What's certain is that you'll have plenty of choices when it comes to processors, GPUs and components when you decide to build a gaming PC.