1-6 of 6 Answers
Push down the cup & blades until seated & twist until it starts.
Sorry, there was a problem. Please try again later.Just twist it once it’s in its socket
Sorry, there was a problem. Please try again later.Just press down on the on the plastic container when it is right position.
Sorry, there was a problem. Please try again later.When you put the cup on push down and lock it in place and it will blend
Sorry, there was a problem. Please try again later.Twist it to start it twist in the opposite direction to stop. Just that easy.
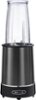
Sorry, there was a problem. Please try again later.Hello, thanks for reaching out. Operating Instructions 1. Place the motor base on a flat, clean, dry countertop or table. 2. Make sure the unit is unplugged. 3. The Rocket Blender comes with 2 sizes of processing cups. Place the food to be processed into the desired cup: tall blending cup or small grinding cup. 4. To assemble for blending, chopping, or mixing, using the blade’s collar to handle, place the blending (cross) blade into the tall blending cup. 5. To assemble for grinding or whipping, using the blade’s collar to handle, place the grinding (flat) blade into the small grinding cup. IMPORTANT: Check to make sure the cup ring is not attached to the blending cup before assembling the blade. If it is, simply lift off to remove. IMPORTANT: In the base of each blade’s collar, there is a plastic gasket seal that creates an airtight fit with the Rocket processing cups. After dishwashing and before each use, always check to make sure the gasket is properly in place, as the heat from some dishwashers may cause the gasket to become loose. 2 Tall Blending Cup Shaker Lid with Small Holes Shaker Lid with Large Holes 2 Lip Rings 2 Storage Lids Small Grinding Cup Grinding Blade/ Flat Blade Grinding Blade Gasket Seal Grinding Blade Collar Blending Blade/ Cross Blade Blending Blade/ Gasket Seal Blending Blade Collar Motor Base Polarized Plug SO-314493_14639_12piece_rocket blender_Black_IM_R4.indd 6 2018-06-28 12:04 PM 7 WARNING: Never operate the Rocket Blender when the cup (tall or small) is empty. WARNING: Never overfill the tall or small cup. Do not exceed the MAX line. 6. Hold the cup (tall or small) firmly in one hand. Use the other hand to tighten the cup/blade assembly by turning the blade collar clockwise until snug. 7. Plug the power cord into a 120V AC electrical outlet. 8. Invert the processing cup/blade assembly. Insert the blade collar into the motor base, fitting the tabs into the slots on the motor base. NOTE: The Rocket Blender will not operate unless the 3 locking tabs on the processing cup are properly fitted into the 3 slots on the motor base. 9. To process, press down the processing cup (tall or small) and turn it clockwise into the motor base until it is locked. To stop, press down and turn counterclockwise the cup until the tabs are fully aligned. Release the cup. The blender will operate until pressure is released. NOTE: When the rocket blender is used for the first time, it is not uncommon for it to emit a slight odor. This is normal and should disappear with use. 10. When processing is completed, turn the cup counter-clockwise in the base and lift to remove the cup/blade assembly. 11. Invert the cup/blade assembly. Hold the cup (tall or small) firmly in one hand. Use the other hand to turn the blade collar counter-clockwise and remove the blade from the processing cup. 12. Add the cup ring to enjoy fresh juice, blended drinks or smoothies immediately. Press down to fasten the cup ring to any of the blending cups. 13. Unplug the Rocket Blender when not in use and before cleaning. Hope this helps. The BELLA Team.
Sorry, there was a problem. Please try again later.