A:AnswerTry to reset the lights, please follow these steps:
1. Turn OFF the tape light.
2. After turn off, speedily press "W" and "SMOOTH" buttons. You will see the light flash.
3. Turn ON the tape light, check it is reset or not. If not repeat 1st step.
4. After several time(1-5times) reset process, the remote will make sync with tape light.
A:AnswerUnfortunately no, the IR coding is pretty generic across most systems like this. Besides physically hiding the IR receiver from the other remote there isn’t a work around.
A:AnswerThere are several how-to videos on YouTube, but it pretty much goes like this:
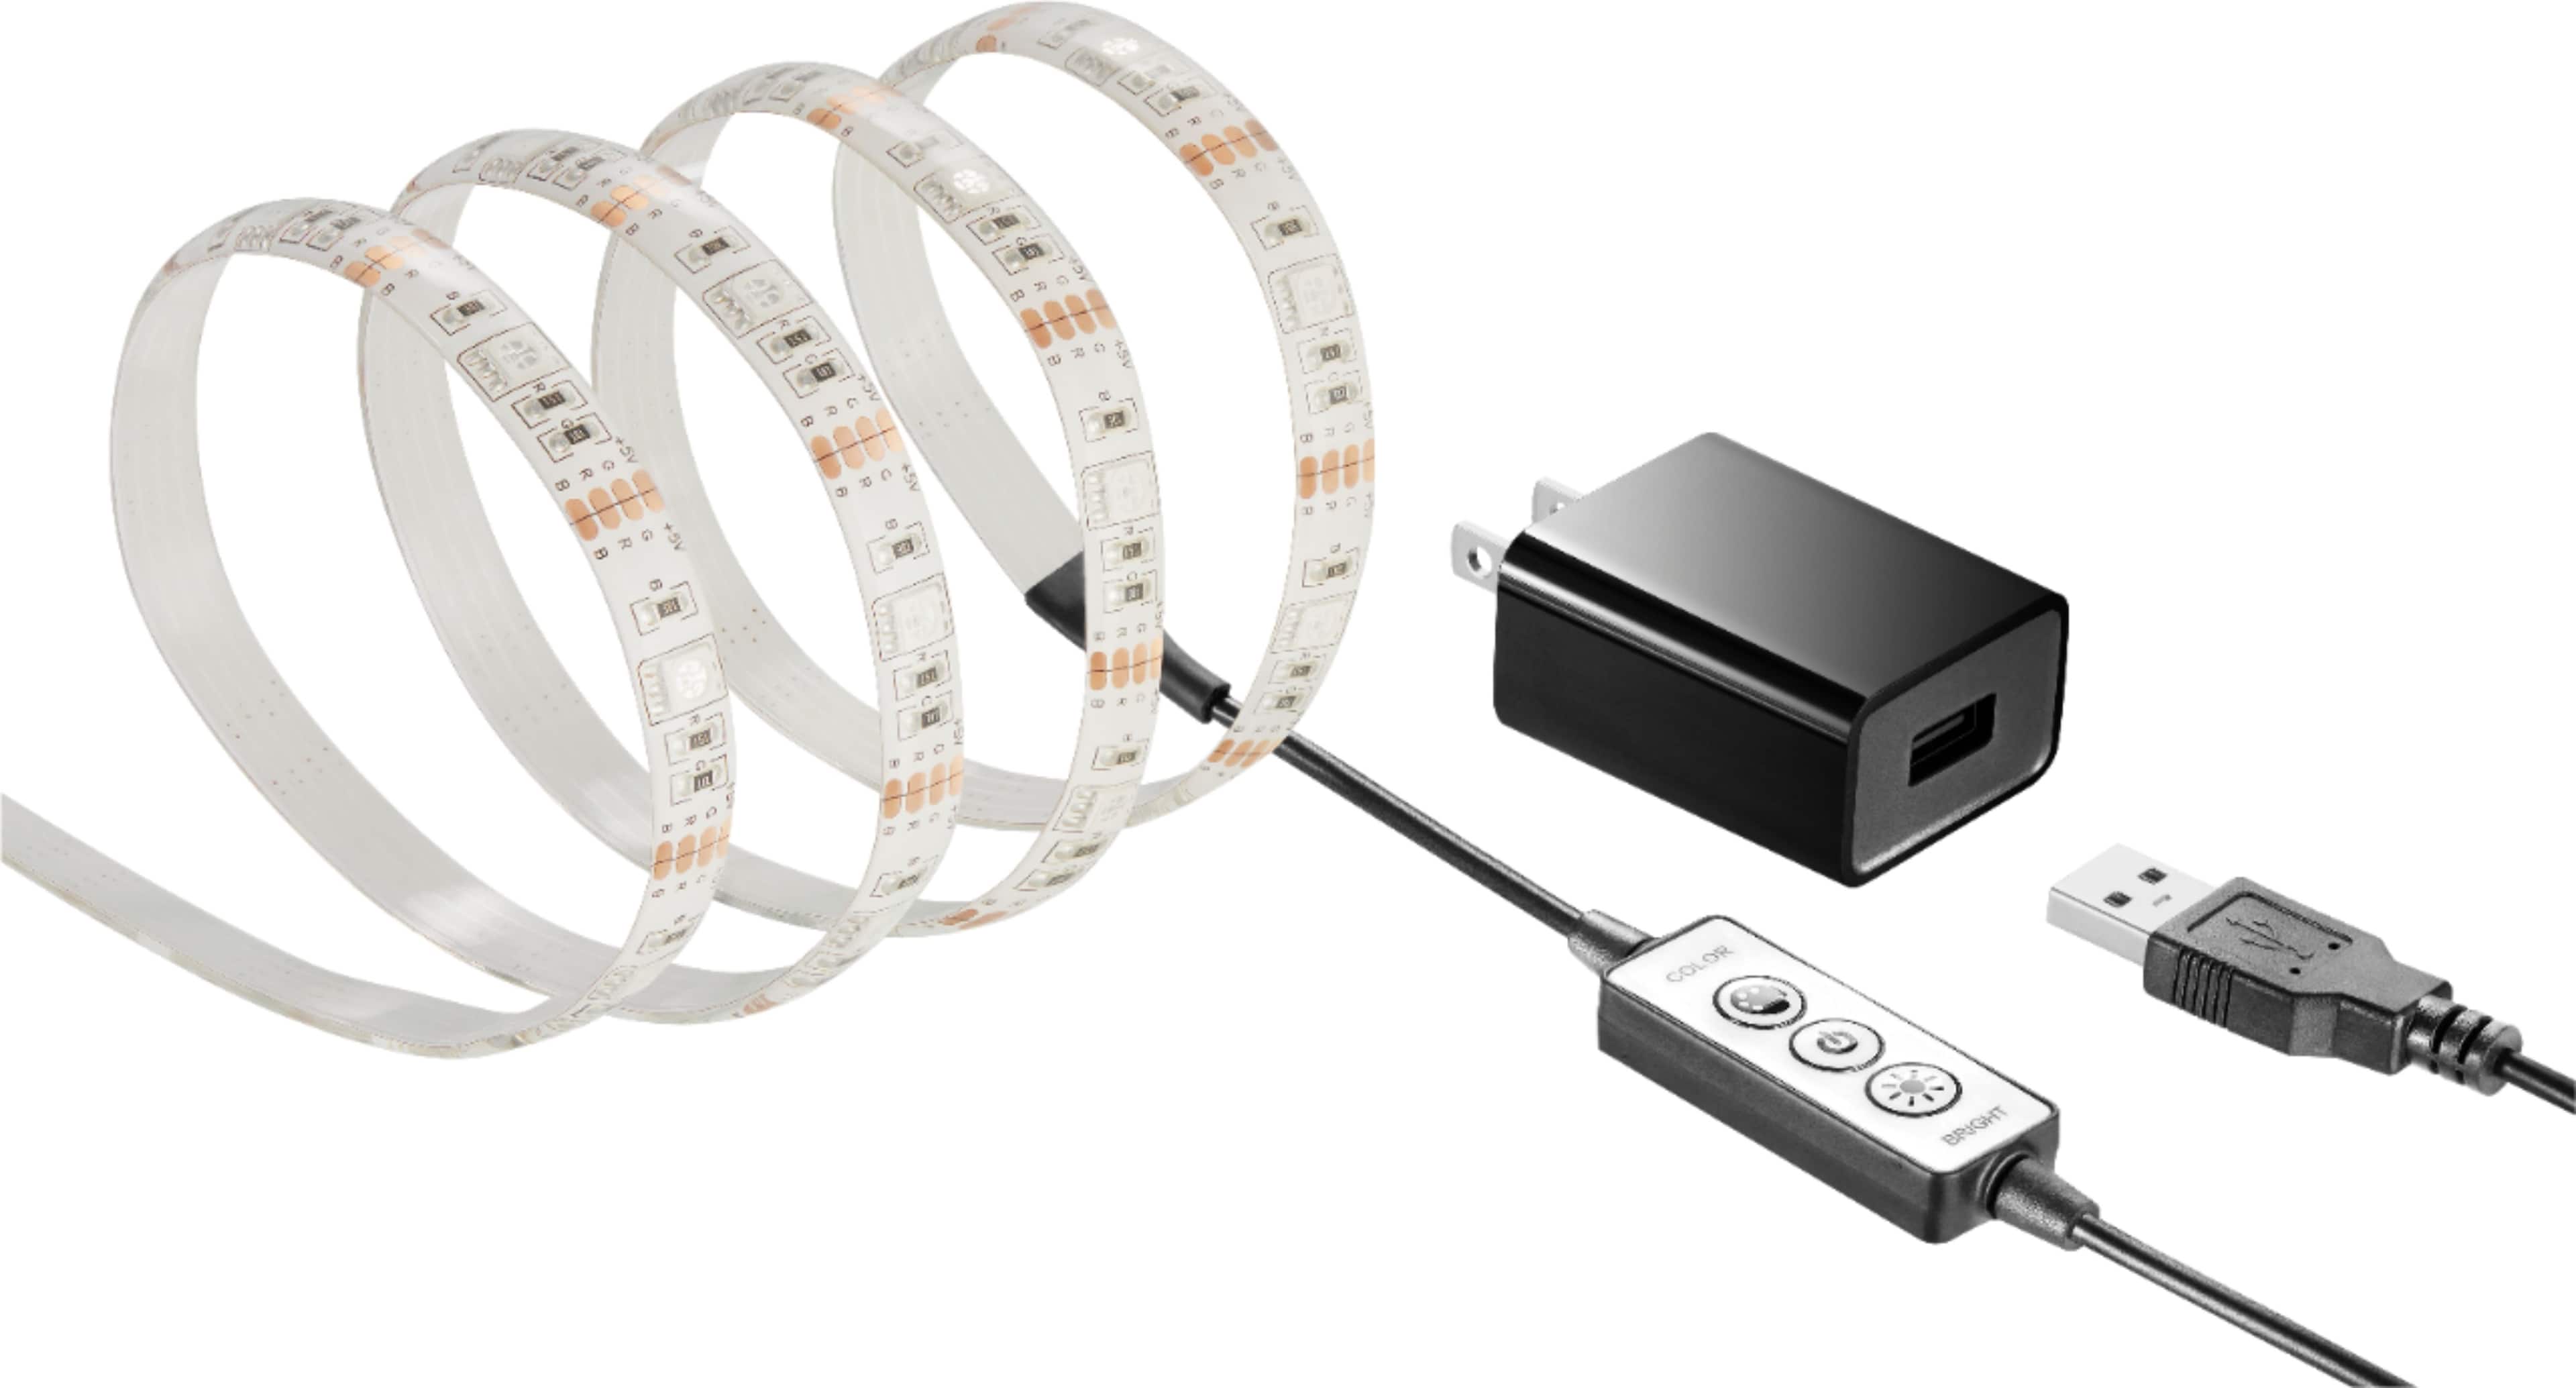
1. Notice the copper spots on the light strip...
2. Find the specific ones that have the cut-line marked between 2 sets of spots.(probably marked with ✂). There will be copper spots, then the cut-line, then the copper spots again, all within about one centimeter or so.
3. Depending on your type of strip, you may be dealing with 4 copper spots or may have 2 spots on either side of the cut line. This list of suggestions work for both.
4. Cut the light strip on the cut line as per how long you want it. If only trying to put 2 strips together, find the cut-mark nearest the end of the 1st light strip & nearest the beginning of the 2nd light strio.
5. STOP! BEFORE you cut the 2nd strip, make SURE you have both strips going in the same direction...Now, cut the 2nd strip @ the cut-mark, but with this one, you will be cutting-off the FRONT of the strip. No worries, you r cutting the power-cord side, because your power will now be coming from the 1st strip's cord. (May want to Google the total linear footage recommended for your name brand and for your power source. It is usually 3-5 strips total (*depending on each strip's total length), more than the suggested-amount will cause dim-light drop-out in the end-lights)
6. Now trim both strips so that the copper spots are exactly exposed @ the butt-end of both of the strip's cut-ends. If your strips have the waterproof plastic coating, this means you will need to trim back the plastic a bit to expose the copper spots, nust a tiny tad.
7. Place the 2 strips, Copper-Spot to Copper-Spot, so that all spots on the 1st strip touch the corrosponding spot on the 2nd strip.
8. I like to tape the underside to ensure that there is no movement in the 2 strips for this next part.
9. Take a soldering-iron and a tiny amount of solder and solder the copper spots of the 1st strip to the copper spots of the2nd strip.
10. Very carefully test your strips to ensure that the solder is making a good connection for the electricity to flow-through, and that all the lights work properly.
11. I like to "Re"-waterproof my strips by adding a thin layer of hot-glue, over the (now cooled) newly soldered, 2 or 4 spot-area. If done carefully, the entire job will be almost completely unnoticeable!!!
*the above diy instructions are not from a licensed electrician, and as such are NOT a complete list, with safety and warning information listed as per required by law. The above list is only a suggestion, not a complete "how-to" list. Readers of the above diy instructions assume all risk and liability if they so choose to follow the above list's suggestions/directions.