A:Answer Hi Donald,
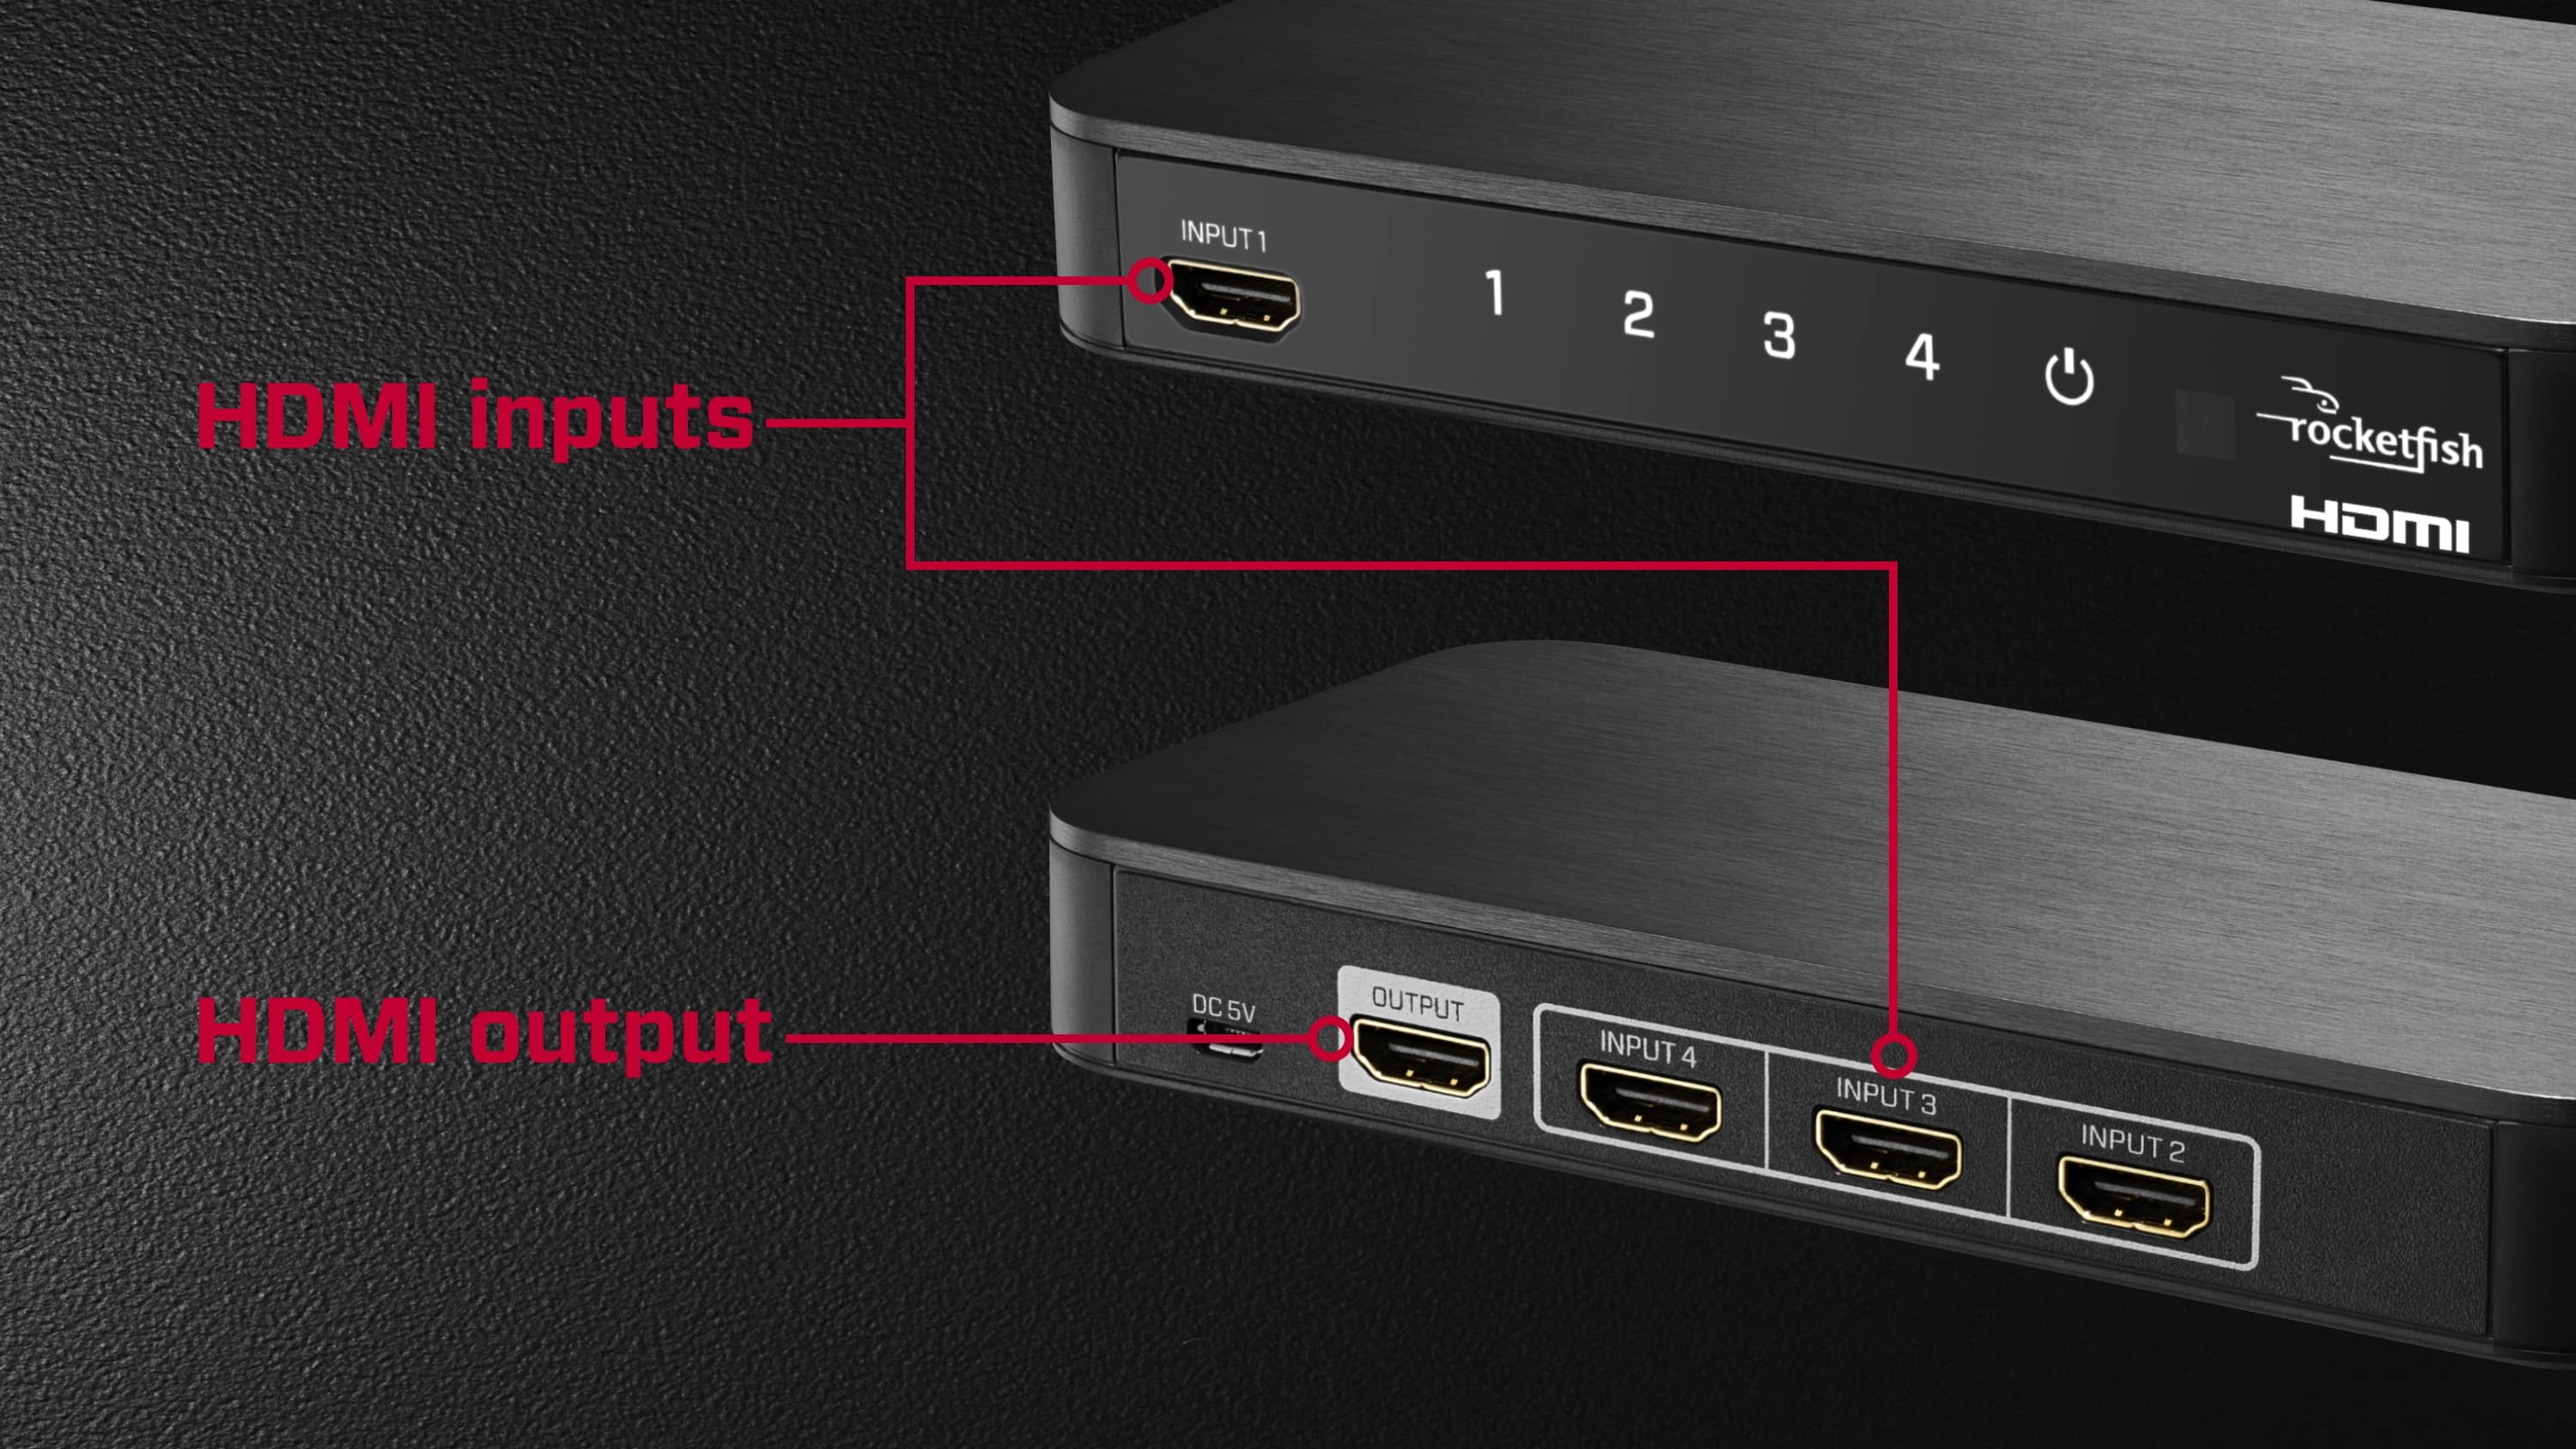
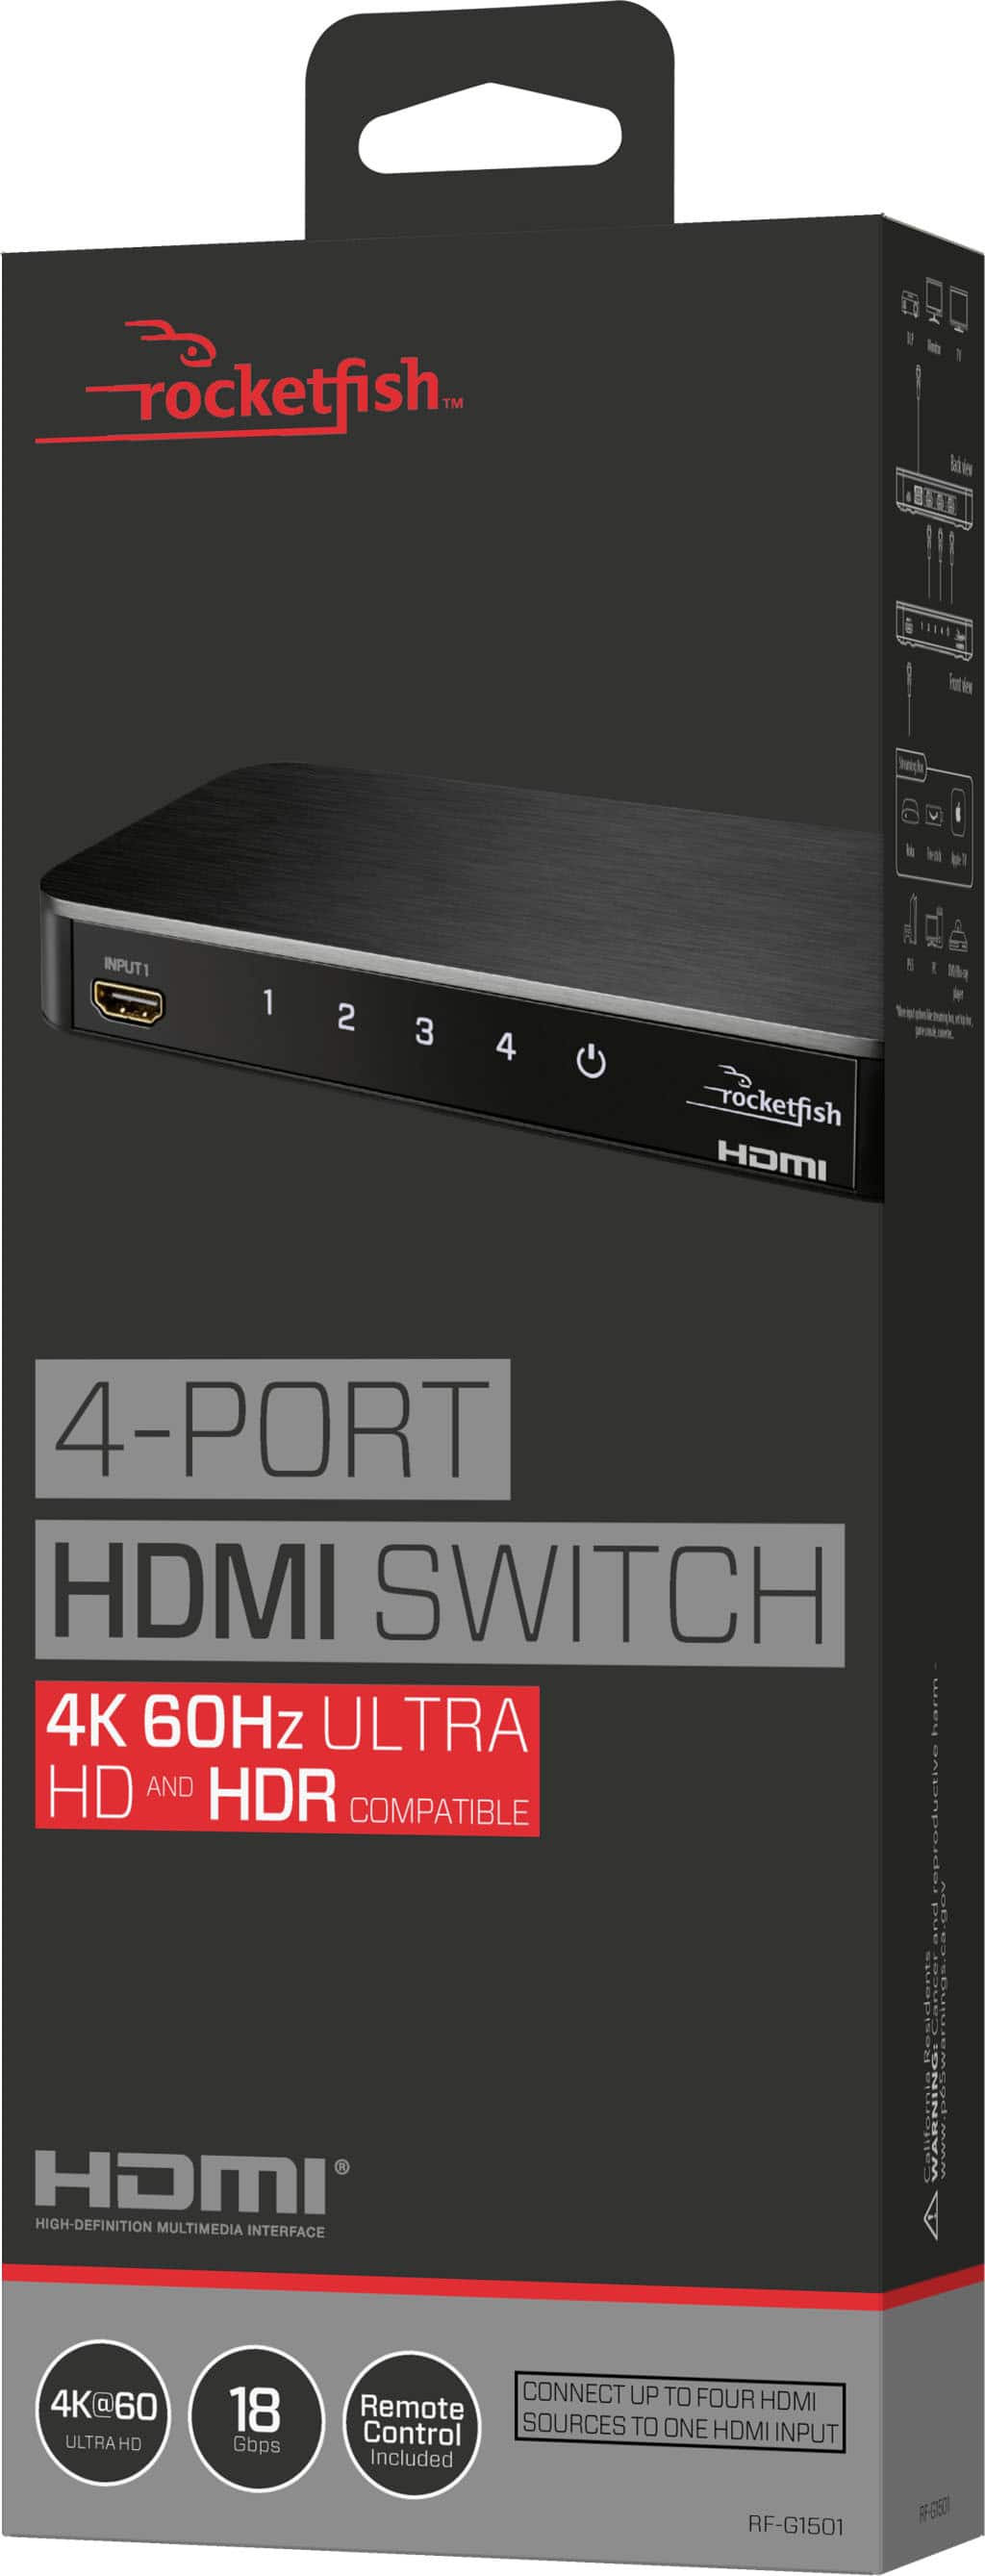
SETTING UP YOUR HDMI SWITCH:
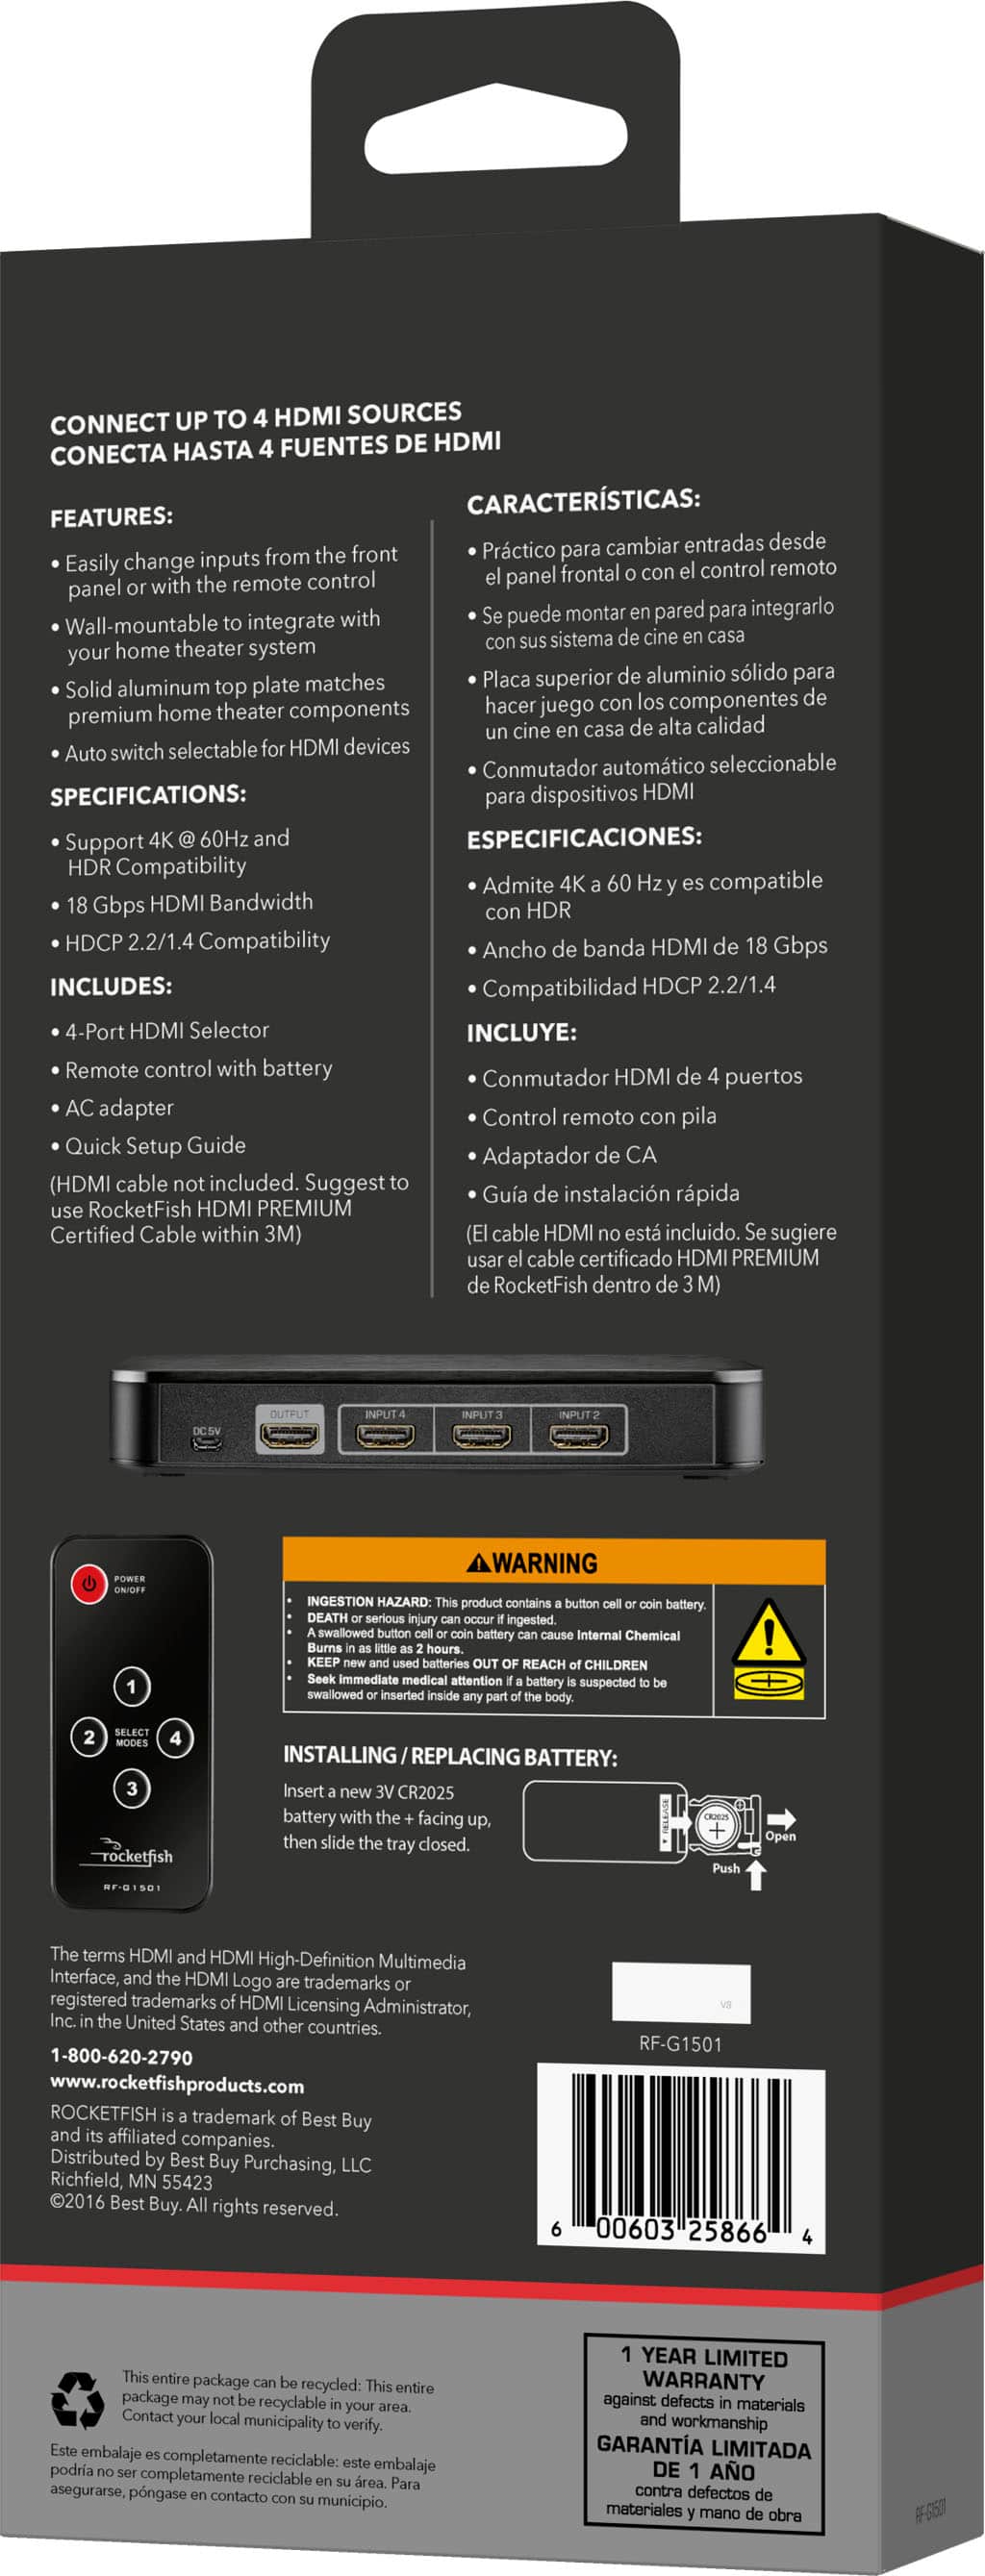
1 Connect HDMI cables from your source devices to the switch’s
input ports.
2 Connect an HDMI cable from your TV (or projector) to the
switch’s output port.
3 Connect the power adapter from the DC 5V port to a power
outlet. The power LED and an input LED light up.
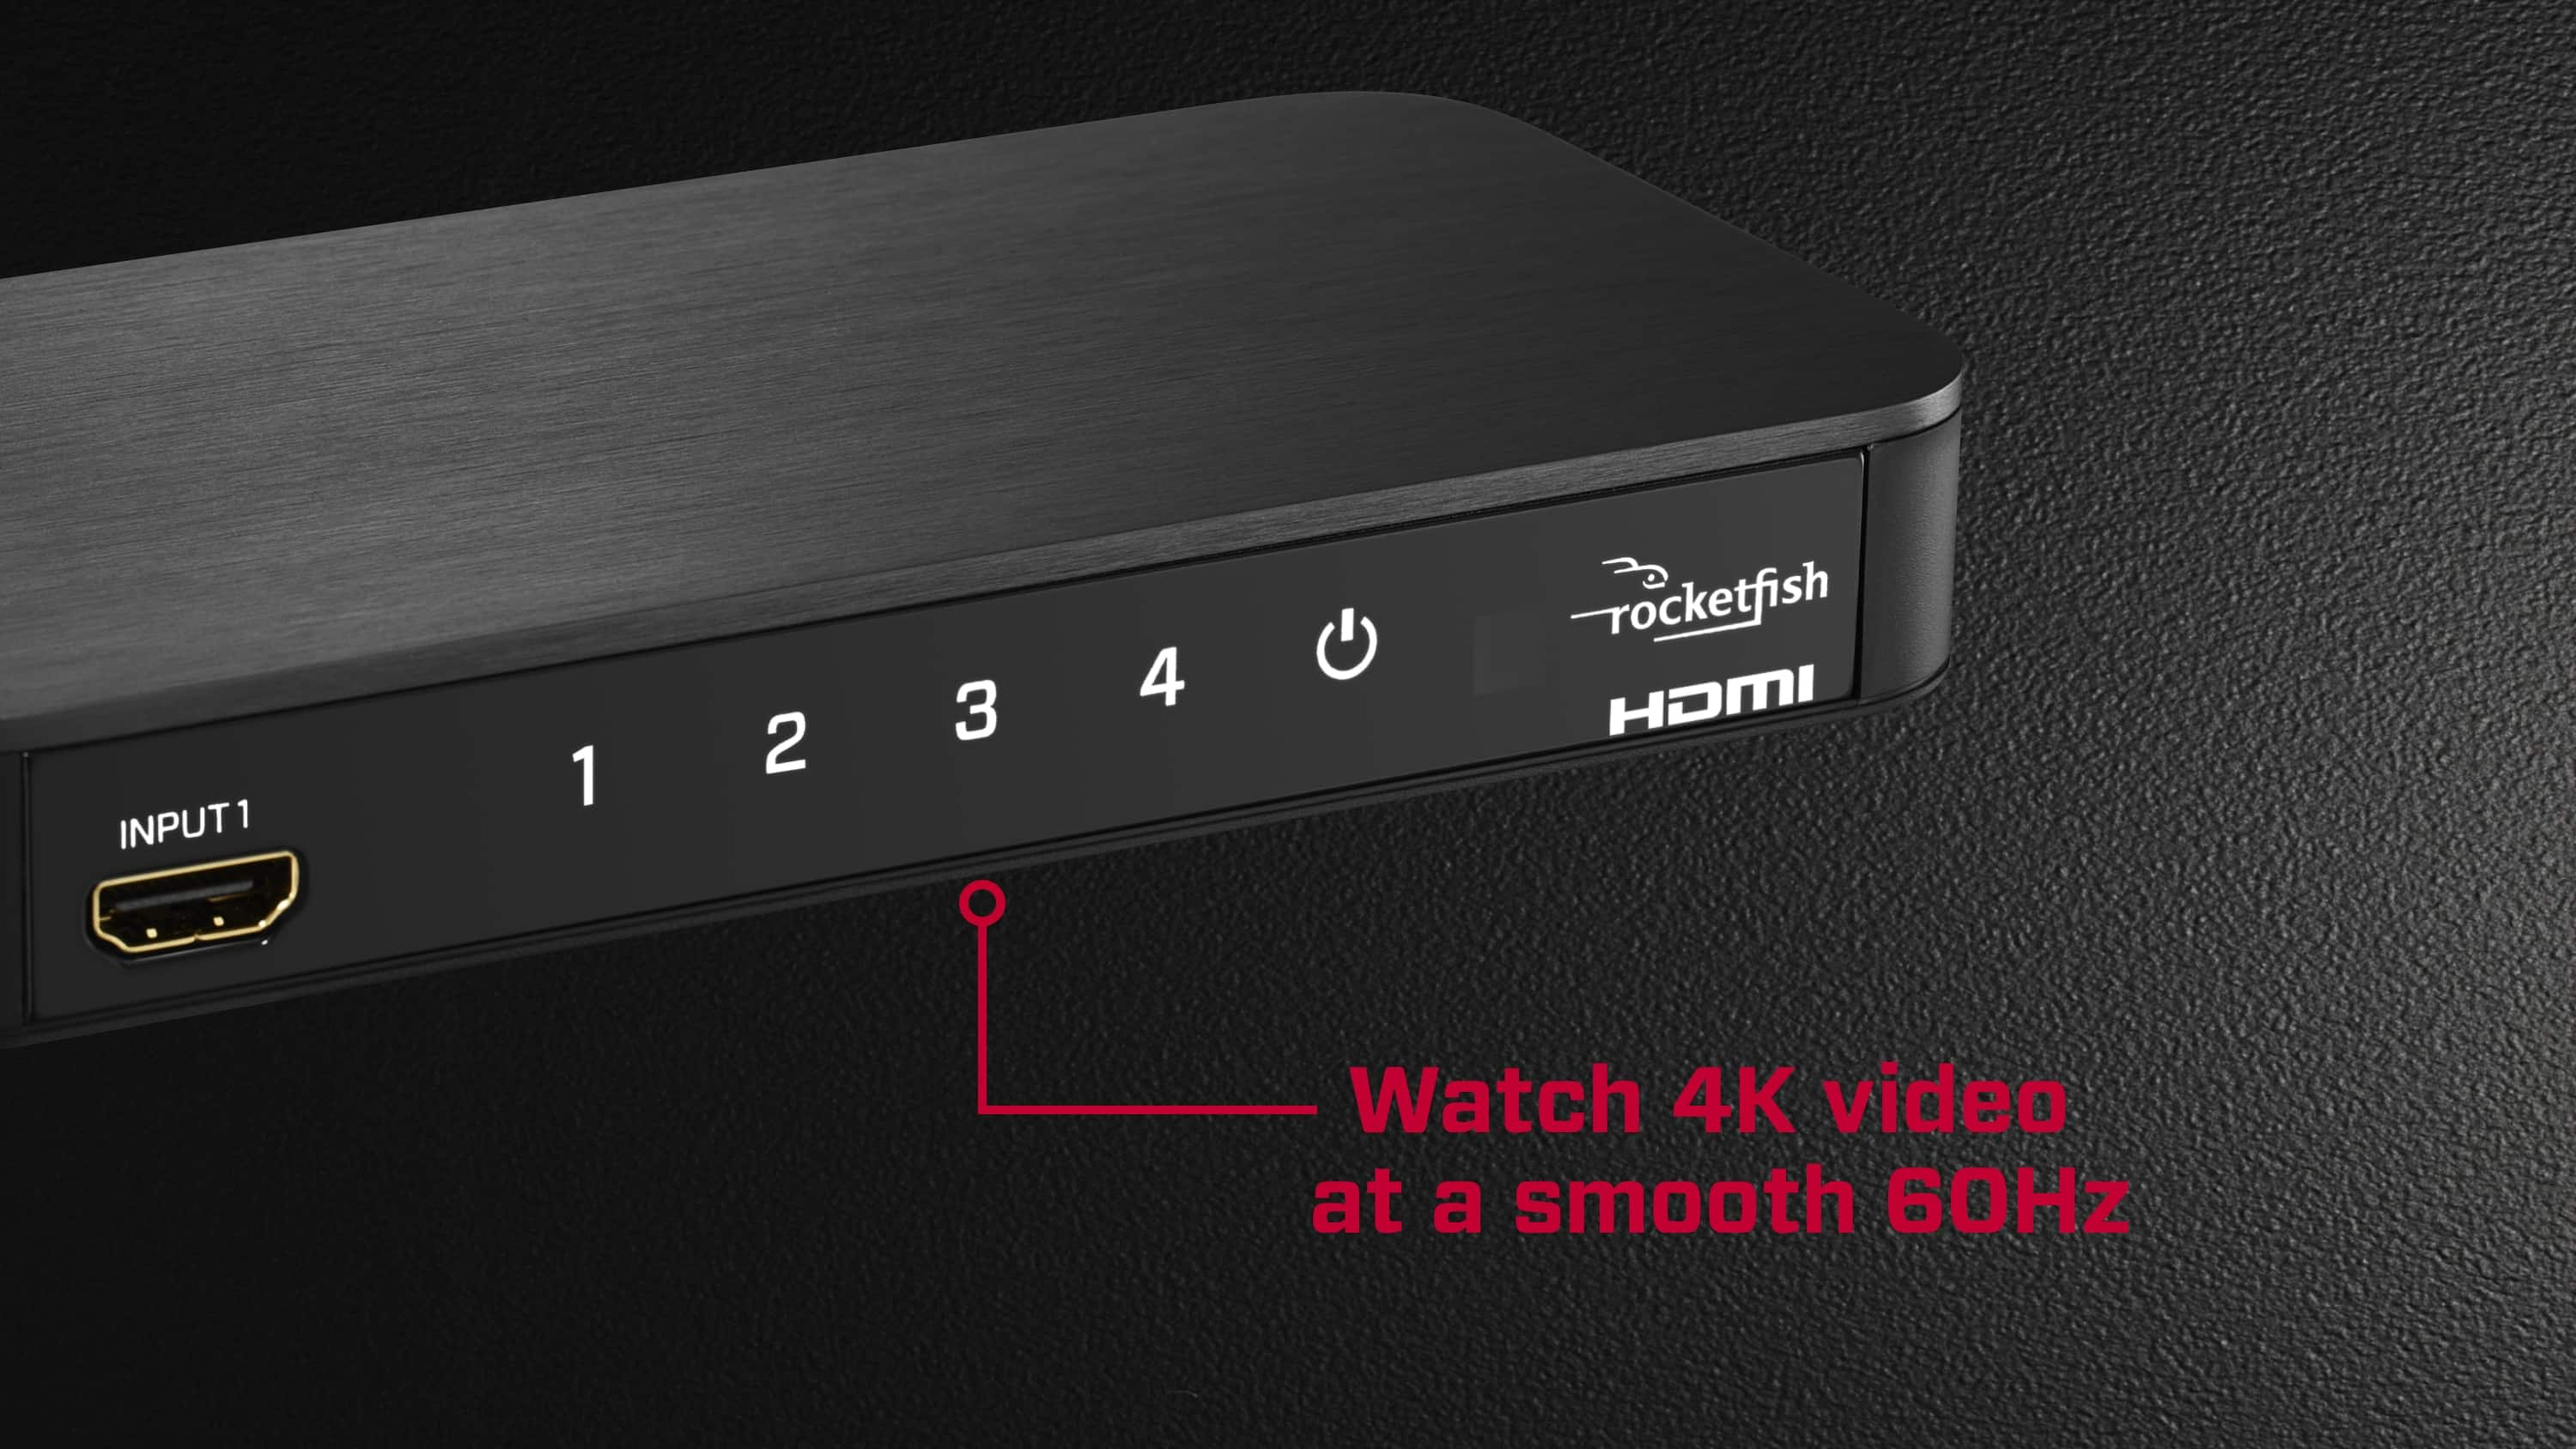
Note: To fully support 4K resolution, connect the input and output
channels using HDMI Premium Certified cables 9.6 ft. (3 meters) or less in
length.
Optional wall-mounting: Install two screws 4 in. (10.2 cm) apart into your
wall, then hang the switch on the screws. Mounting hardware is not included.
USING YOUR HDMI SWITCH:
1 Turn on your TV and the source device.
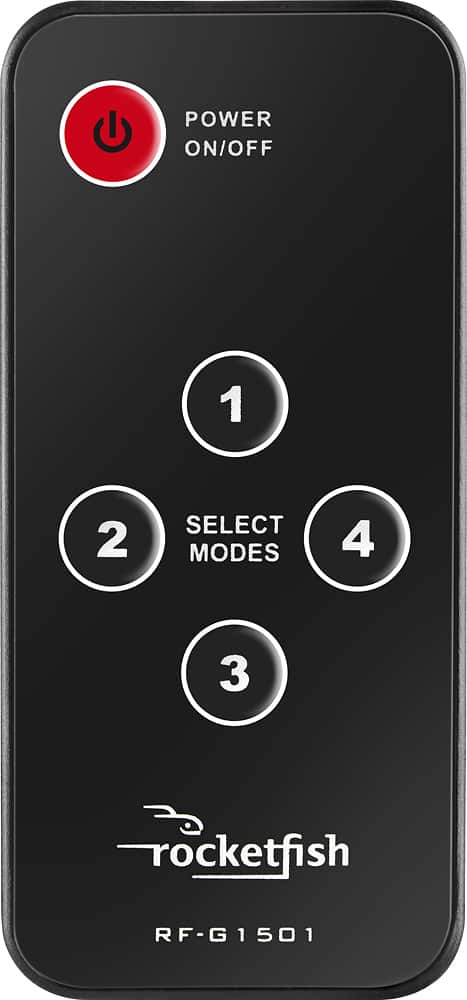
2 Turn on your switch by pressing the POWER ON/OFF button on
your remote control or pressing the (power) button on your
switch.
Note: When the switch is turned on, it automatically switches to the last
input that was used, unless Auto Switch is turned on. If Auto Switch is on,
the switch goes to the device that is turned on.
3 To select a source device:
• Press the number on your remote that matches the input of
the source device you want.
OR
• Tap the number on your switch that matches the input port
that your source device is connected to.
The corresponding input LED lights.
4 Use your source device as usual to play video and audio.
5 When finished, press and hold the (power) button to turn off
your switch.
Note: You may leave the power on while not in use
Rocket fish Support
Irene
https://www.bestbuy.com/site/brands/best-buy-brands/pcmcat1596746025285.c?id=pcmcat1596746025285